A Quick and Dirty Guide To WordPress Post Construction
Logging In
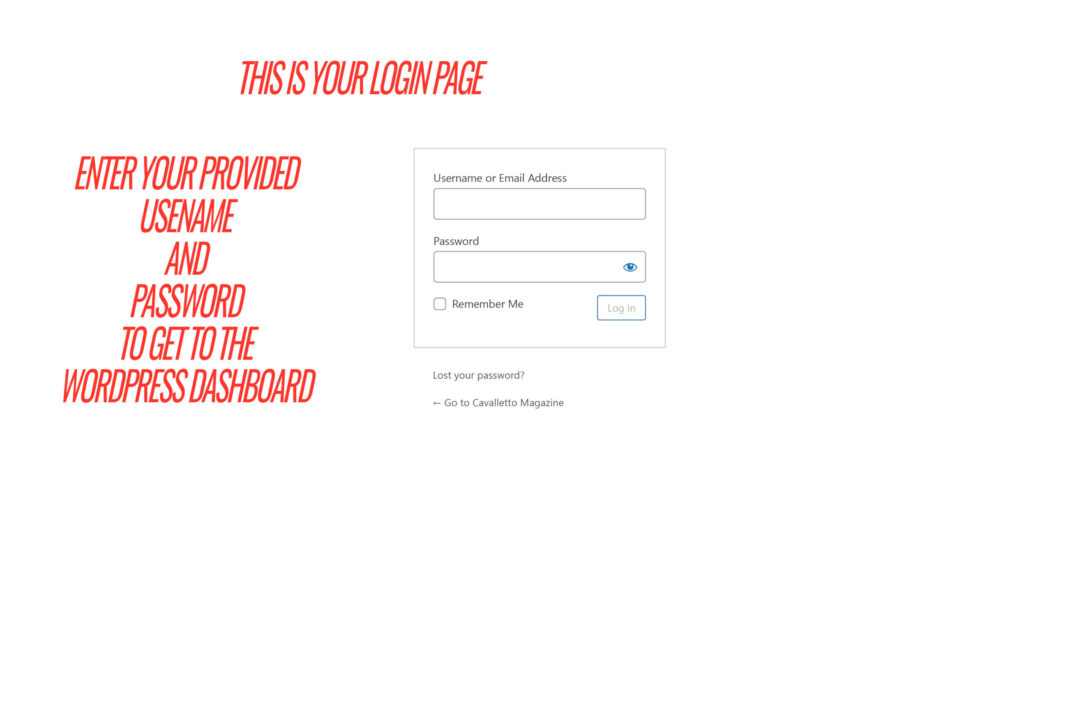
You will be provided with a username and pass world from Cavalletto and that’s how you’ll log into the dashboard
Making A Post
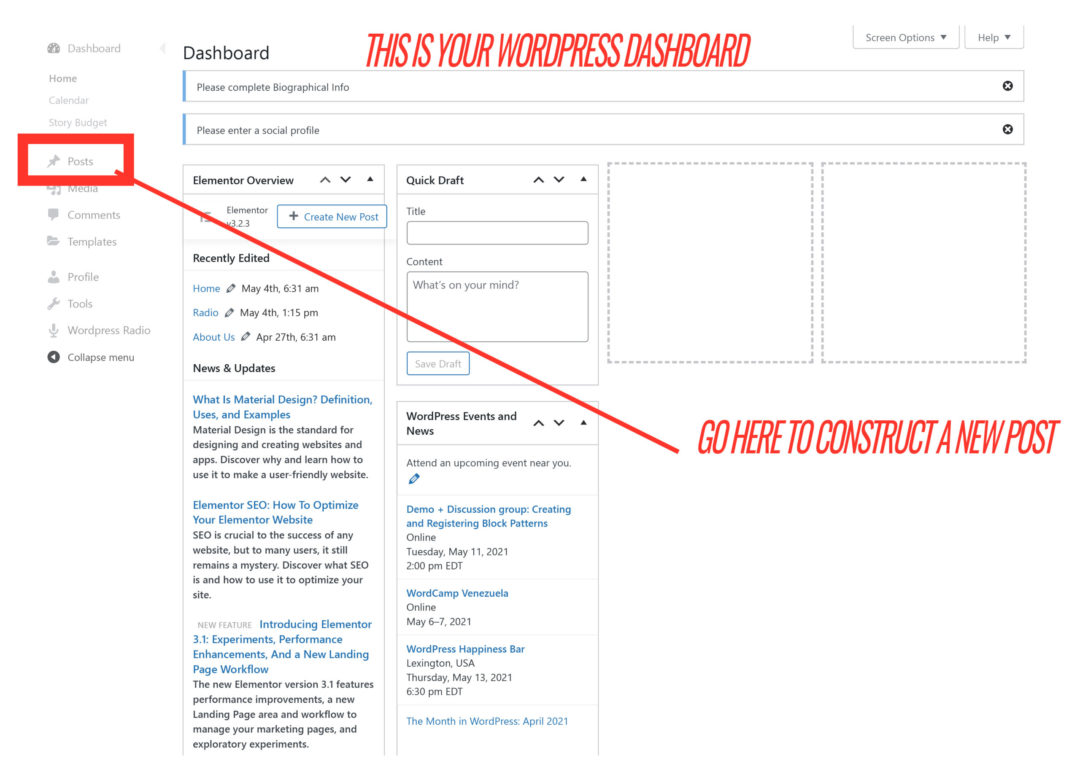
Once you’re at the dashboard go to the left side of the screen and click on posts
Your First Post
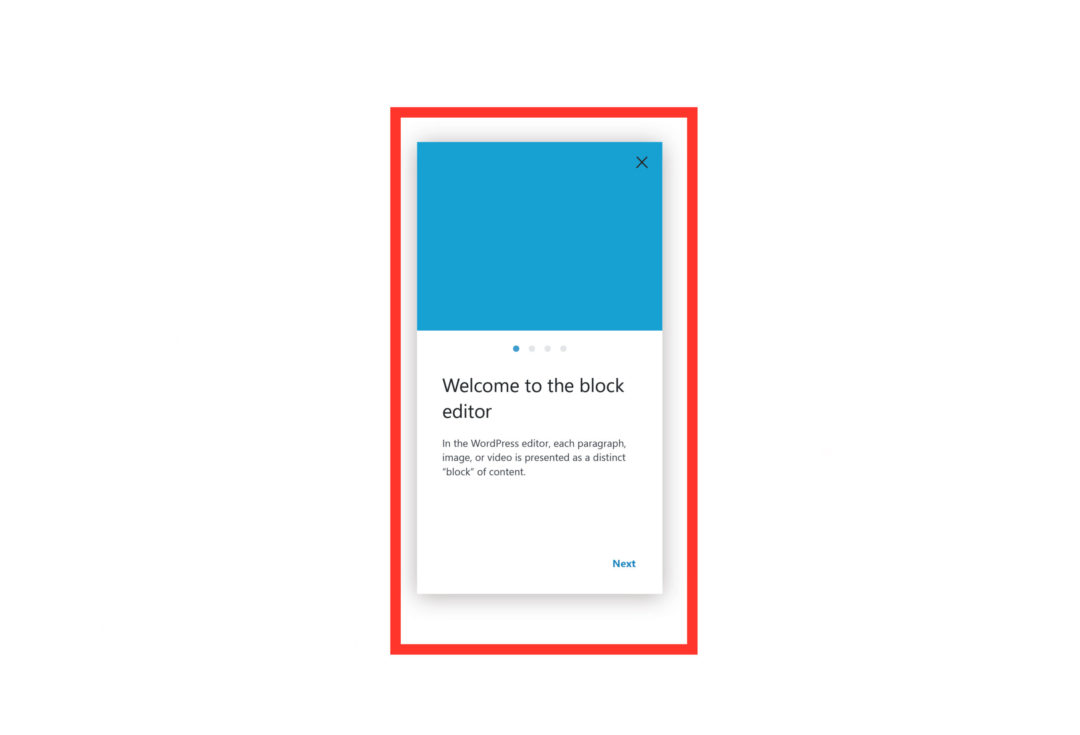
When you start making a post for the first time you’ll be greeted by a tiny screen about how to use “blocks.” Be sure and give it a read because it give a quick training on what blocks actually are and how you edit them.
Post layout
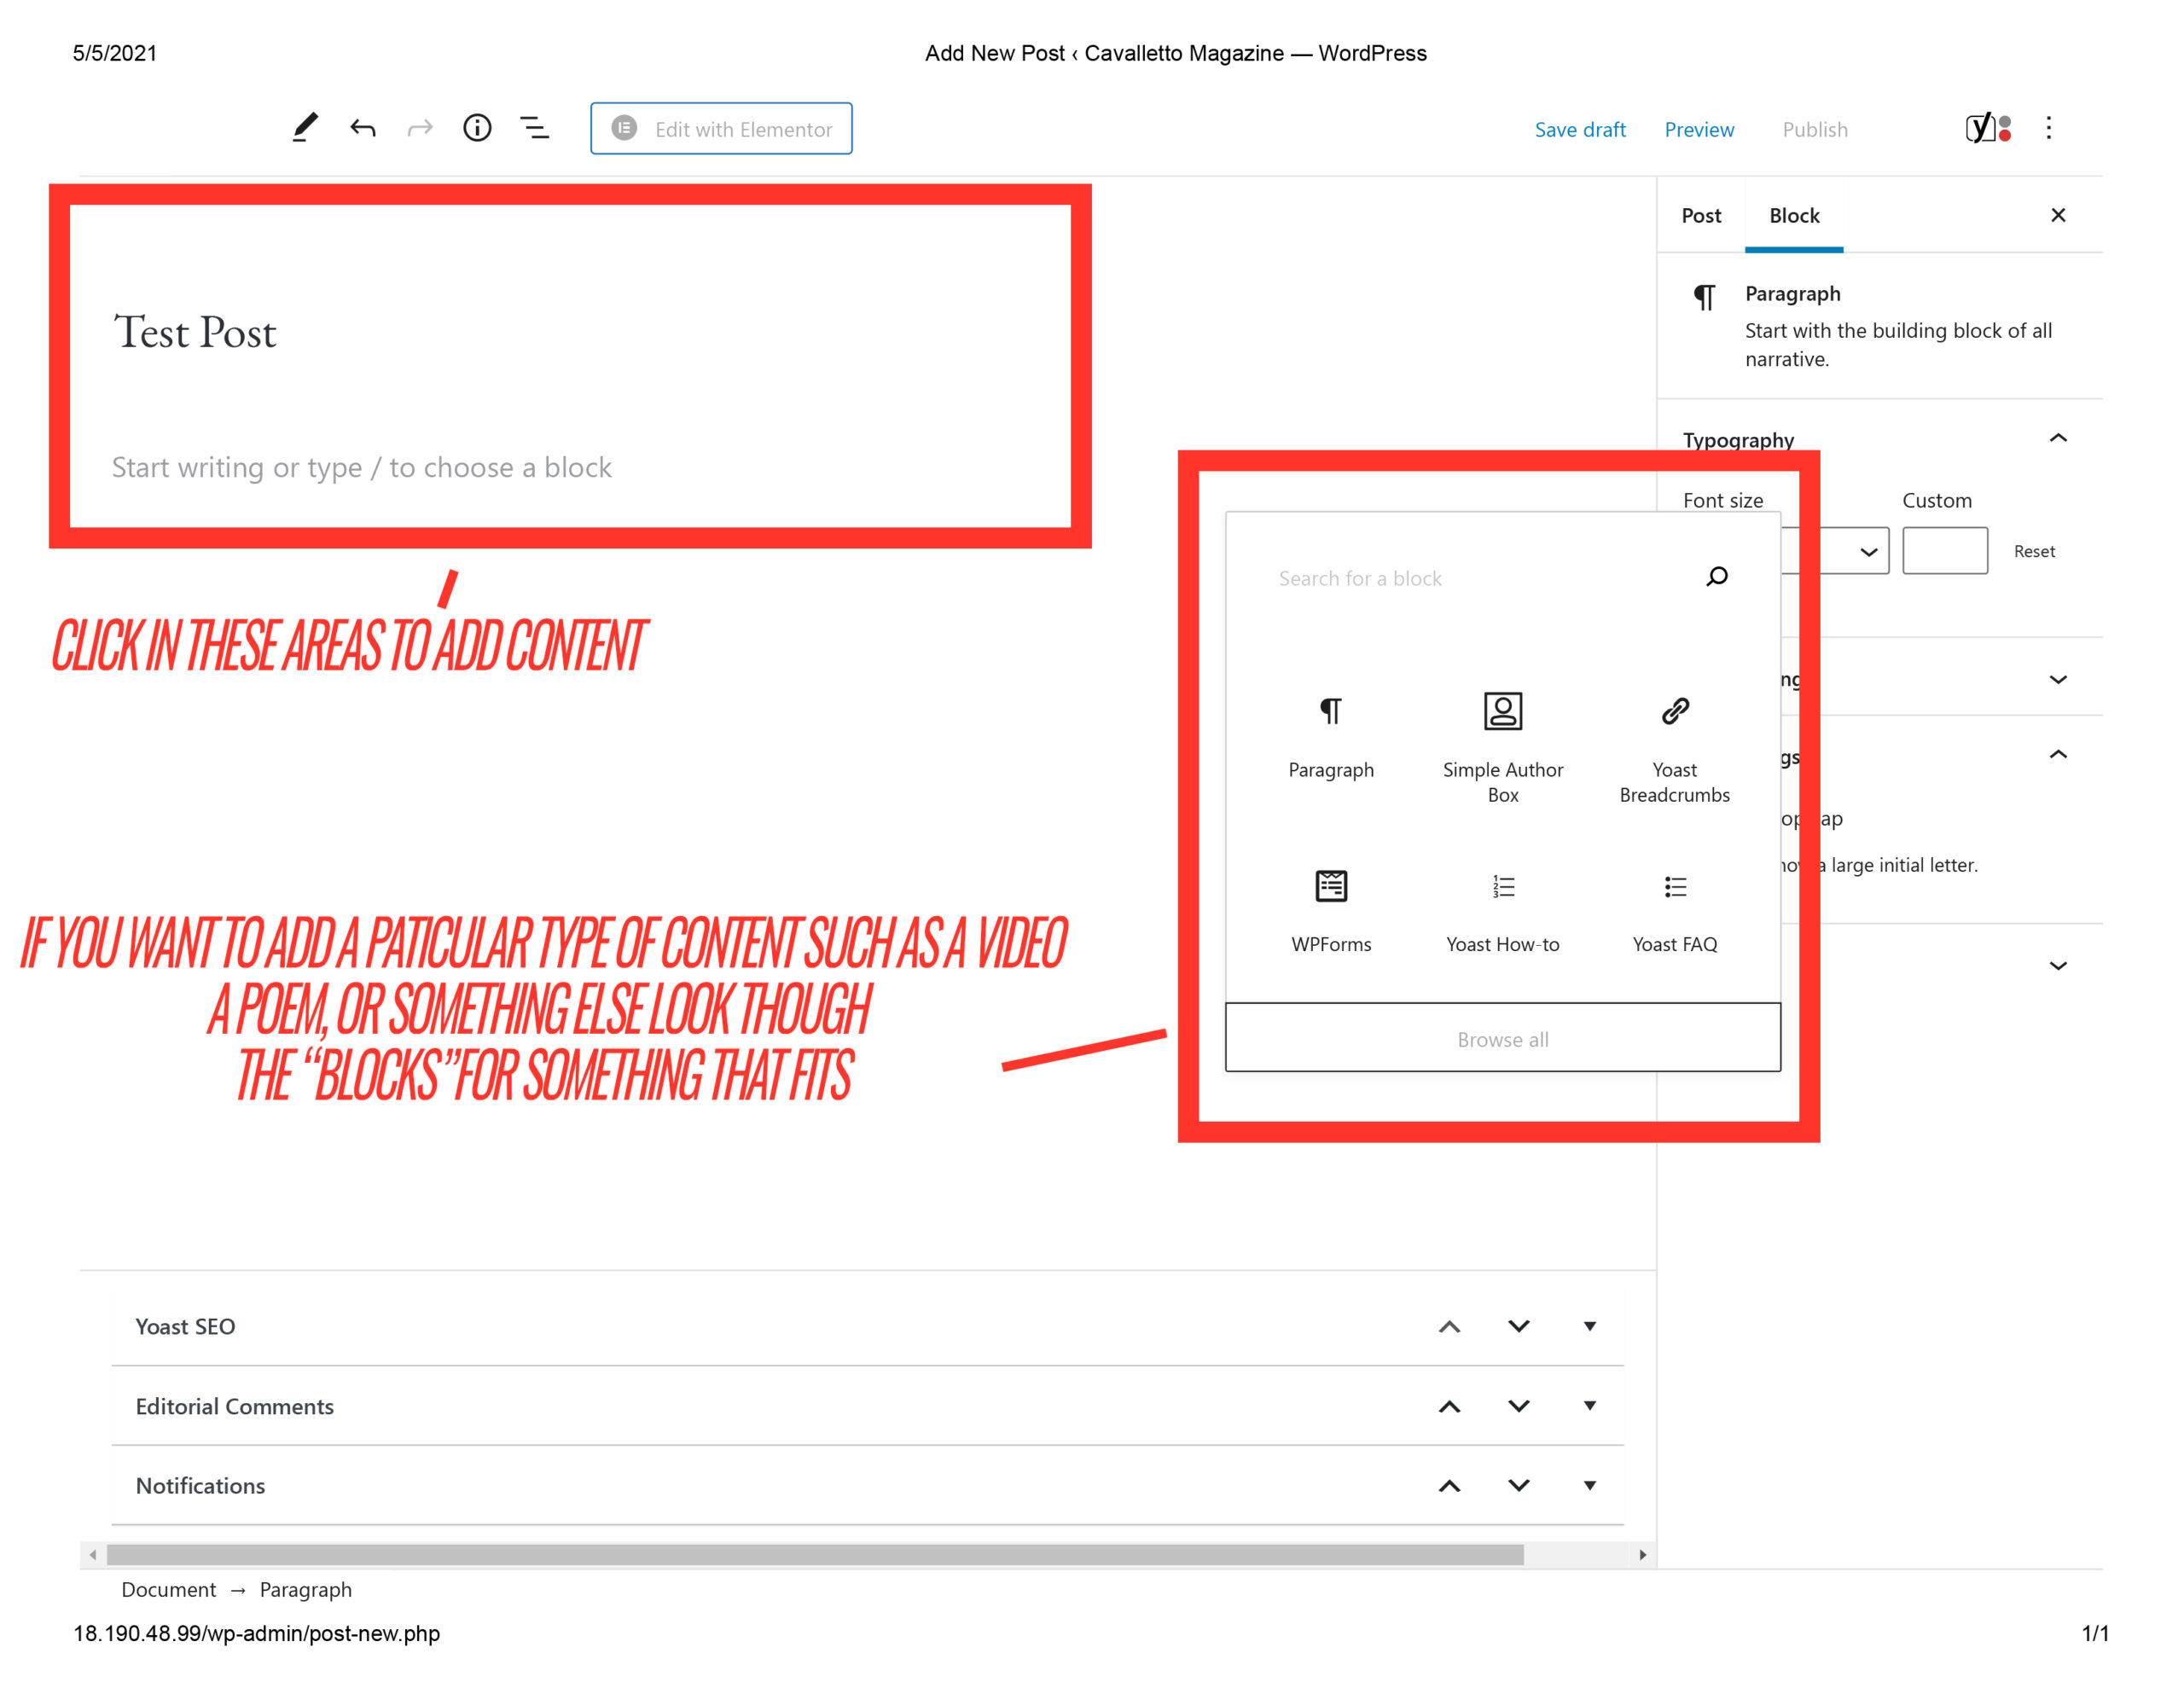
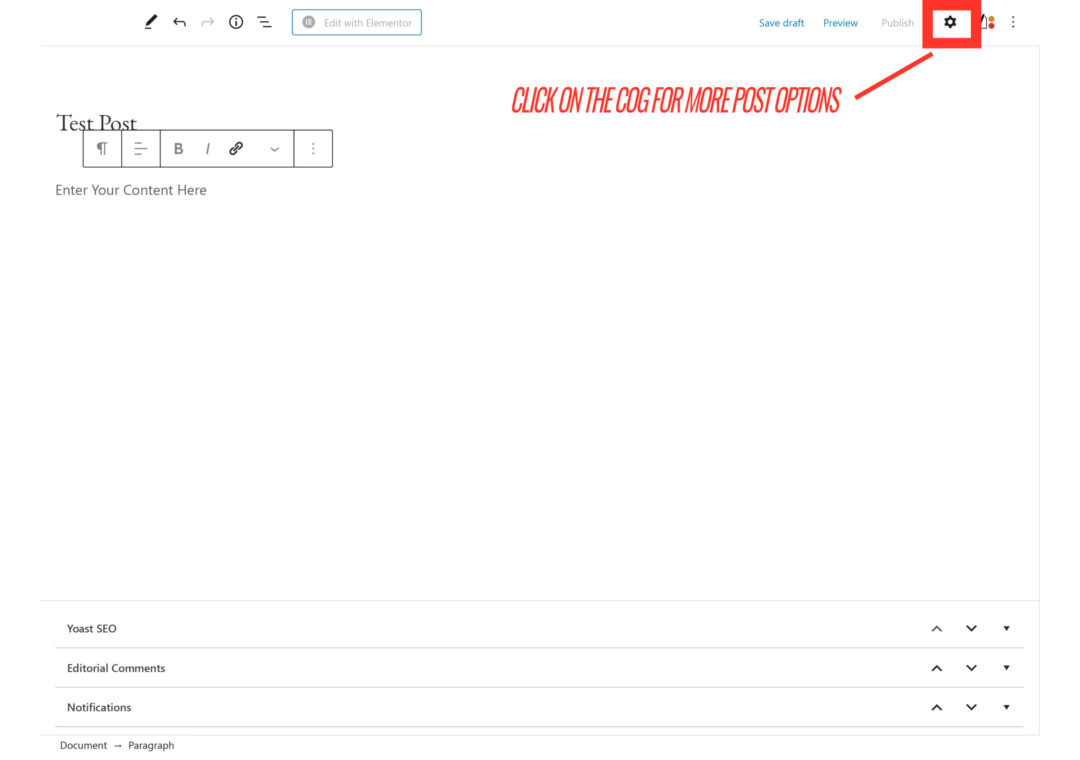
When constructing a post where “Test Post” is written is going to be your post title
Where is says “start writing” will be a “block.”
A block is sorta like a new paragraph for the blog. You’ll see a small black box with a + in the middle and that’s how you choose different kinds of blocks.
There are blocks for videos, images, audio, all kinds of stuff. Some blocks work better for others for things such as poetry. Play around with the blocks and you’ll get the hang of it pretty quickly
Finished with your blog? Not yet.
Once you’ve finished laying out your blog and adding in content go to the top right hand corner of the screen and click the little cog for more details.
Adding Info To Your Post
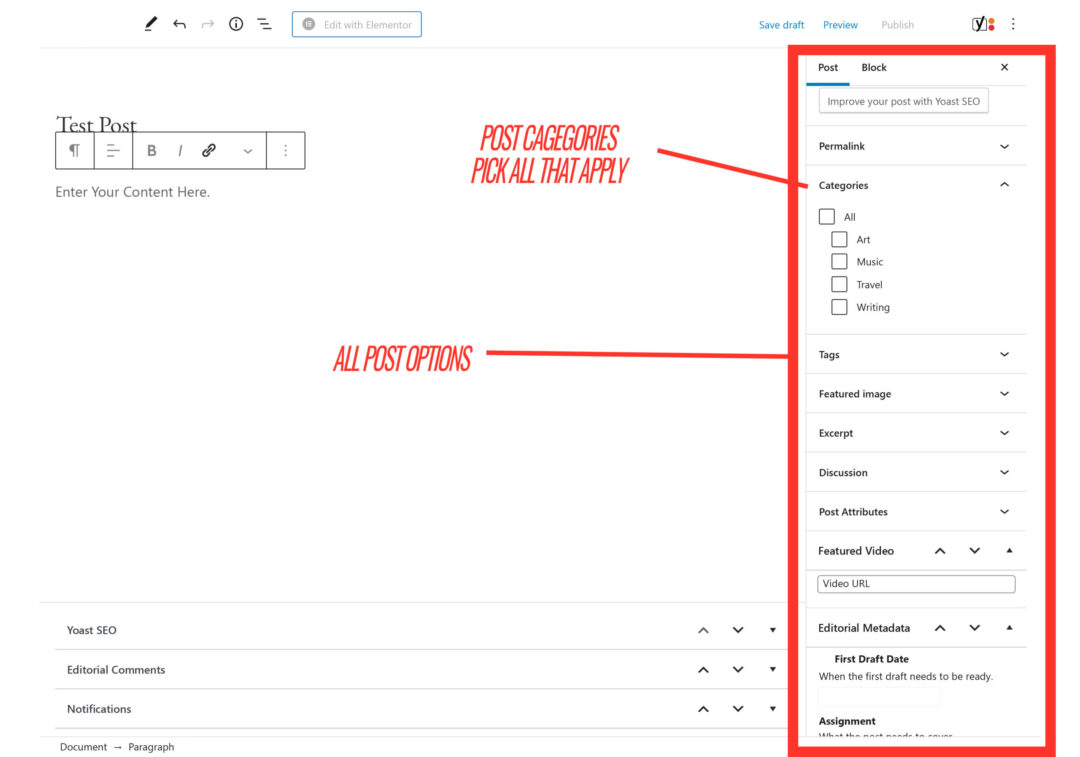
scroll though the post options and add
- Categories
- Tags
- Featured image
Featured Images
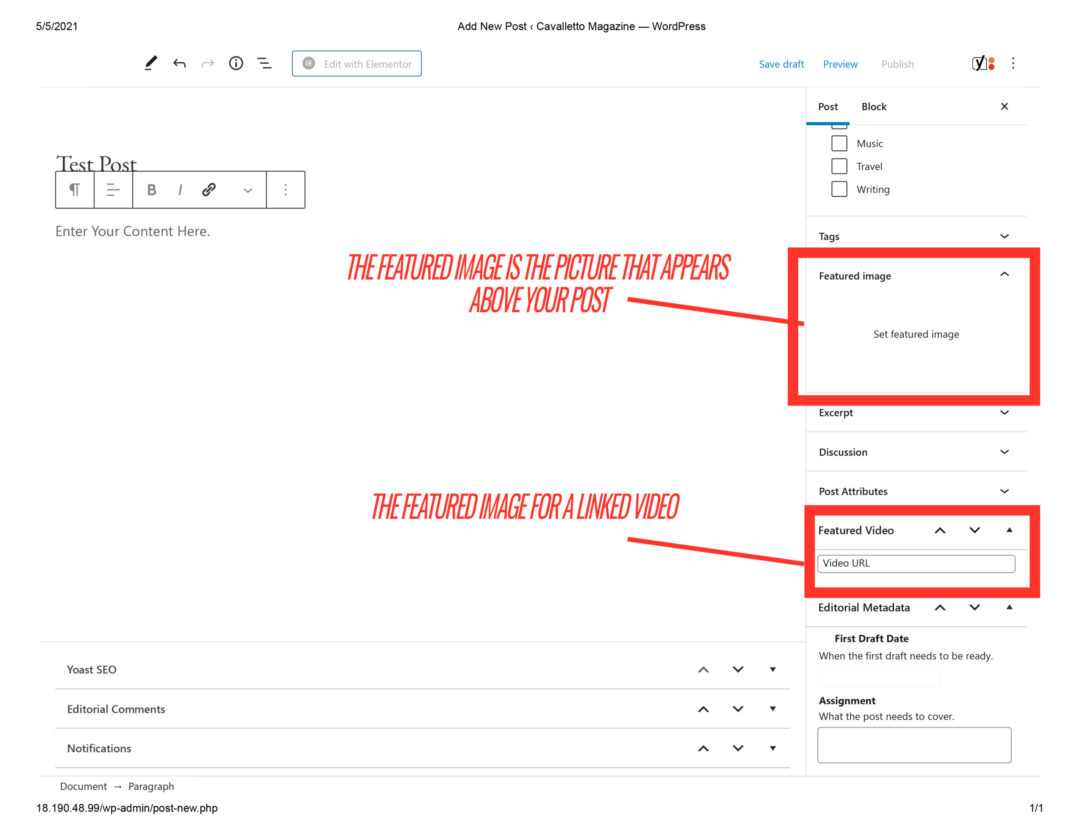
If you’re doing a non-video post be sure and add an image to your featured Image drop down. These images will come from the Media library or you can upload a custom image.
Note: I’ve had better luck with smaller sized images.
For videos: Use the Featured Video Tab and ad the URL address from the video you’re sharing. It should automatically make a thumbnail that’s used with the original video for the post image.
Adding Images
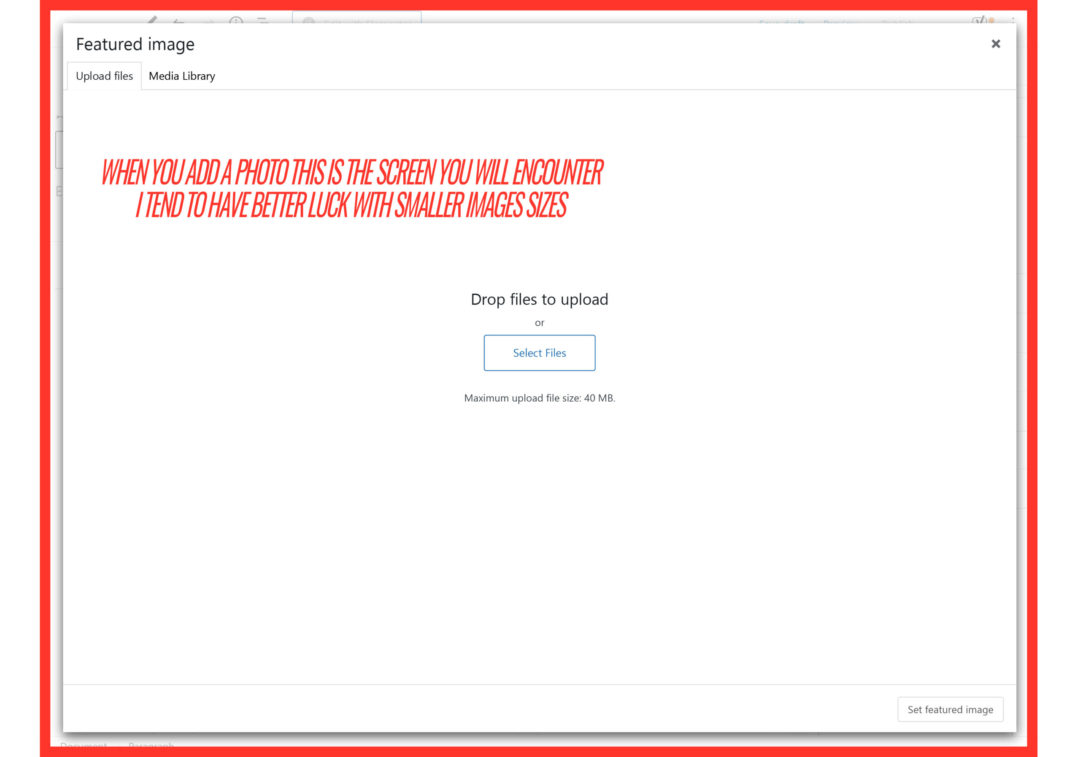
This is the screen you will view when adding images. It’s just like any other website. You have two options, pull an image from your media library that’s already been uploaded or you can upload your own custom image to your post.
SEO (Search Engine Optimization)
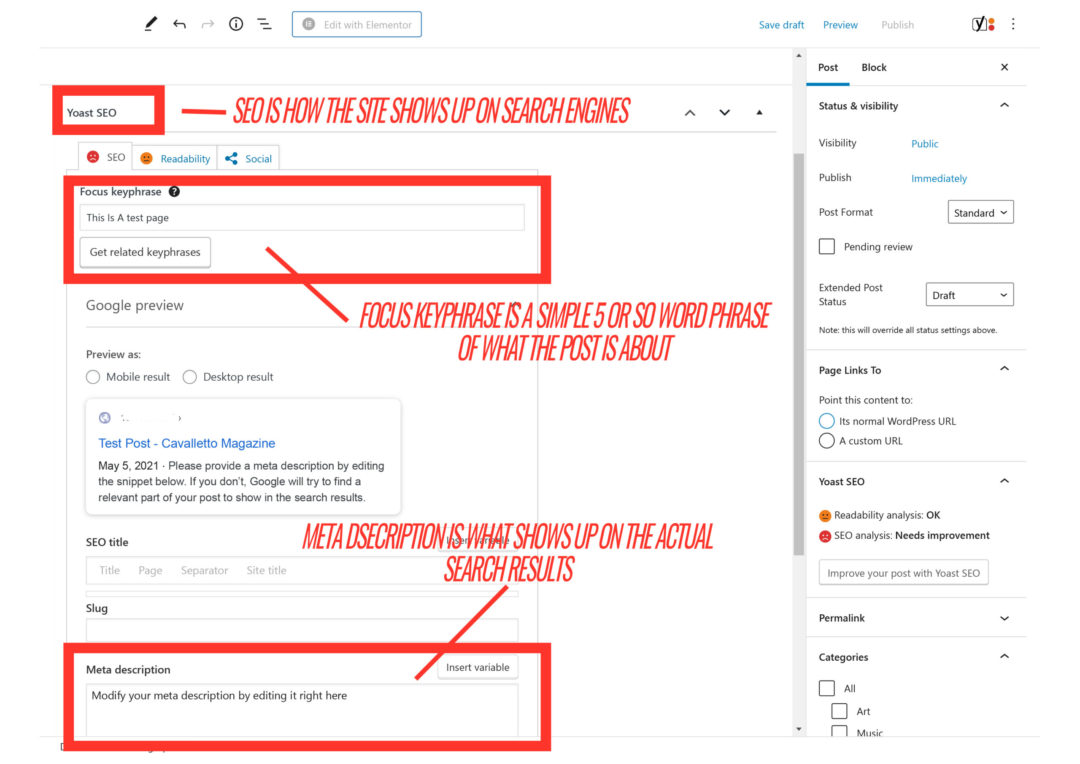
At the bottom of your post page you should see Yoast SEO. This is basically how your post shows up to search engines such as google.
The first thing you want to do is ad a “Focus Keyphrase” This is 5 or so words that reflect what your post is about. Such as “Eastern Kentucky Painters” It’s a short phrase to get the point across about the post
Second is the Meta Description. This is the description that will show up on social media and search engines. This can be something like “Eastern Kentucky painter known for painting the most awesome folk art portraits!”
Note: Your featured image will show up in the post.
See A Preview
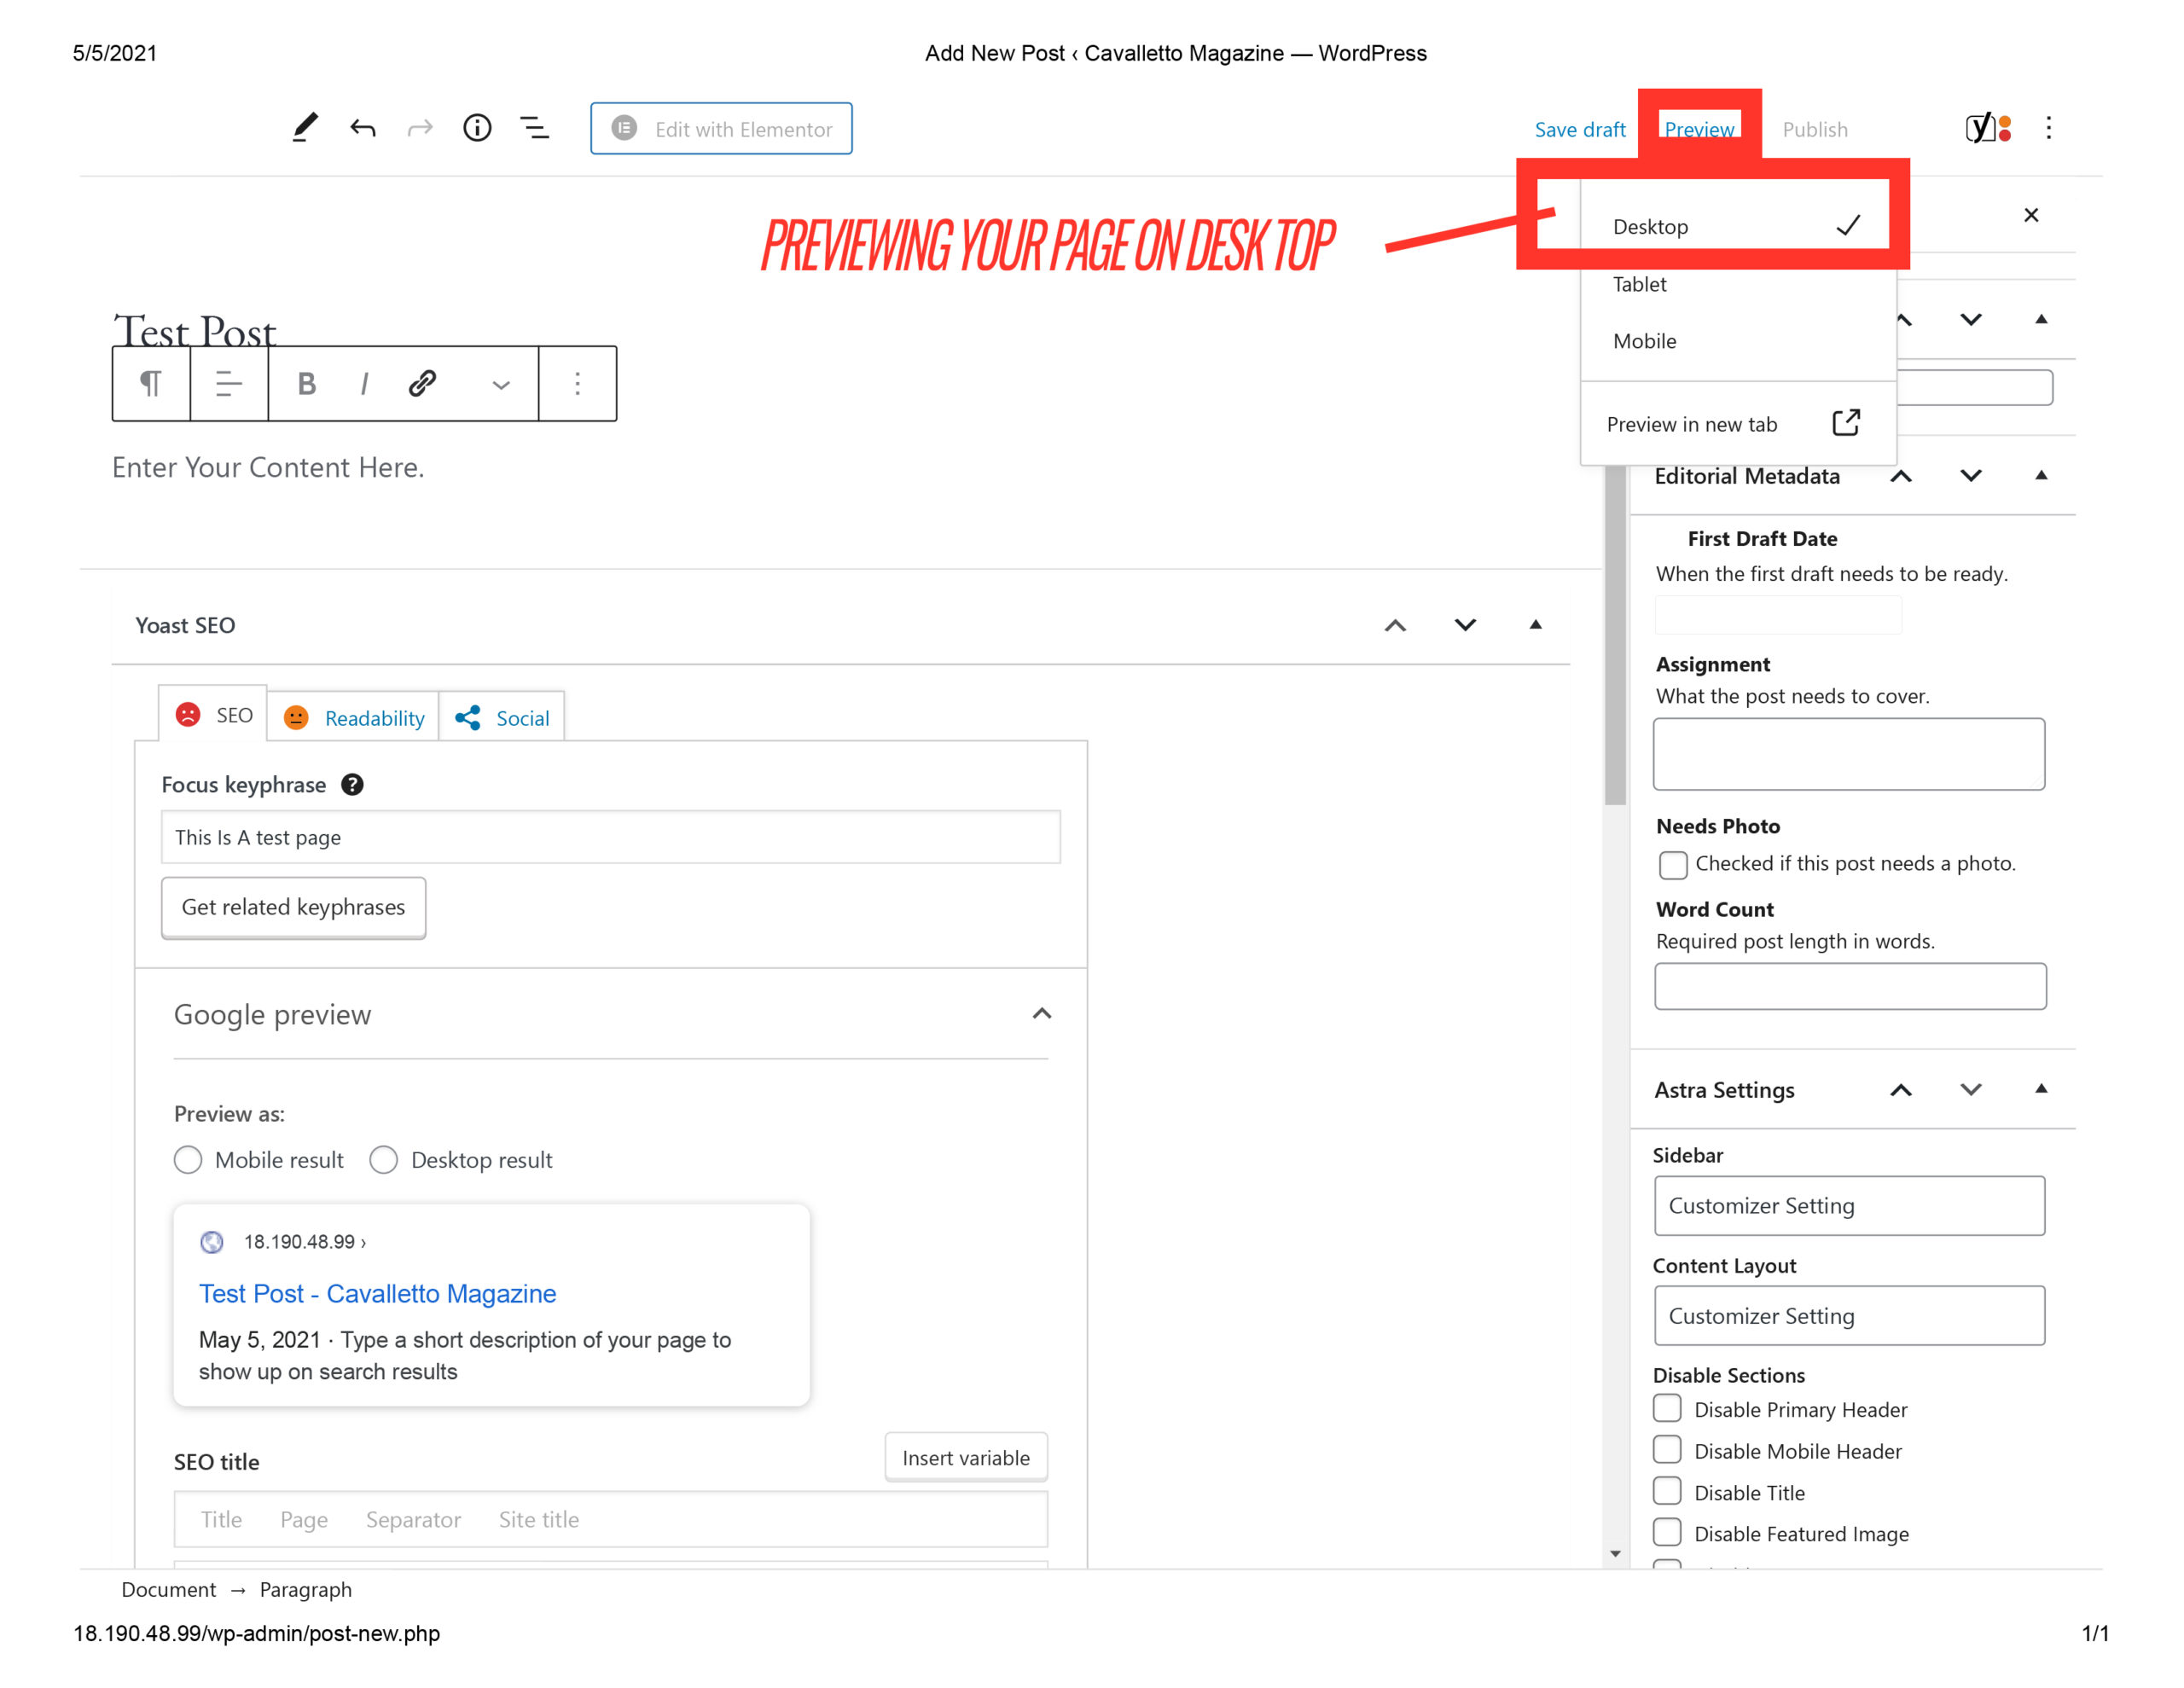
Go to the top left and press on preview. It’s going to give you the option to preview on Desktop, Tablet, And Mobile.
Usually I only preview on Desktop. Once you click on desktop. Click on “preview in new tab” and the brower will open a new tab and you’ll see what your post is going to looks like. If you like it great! lets publish. If you don’t close the tab and make some more changes.
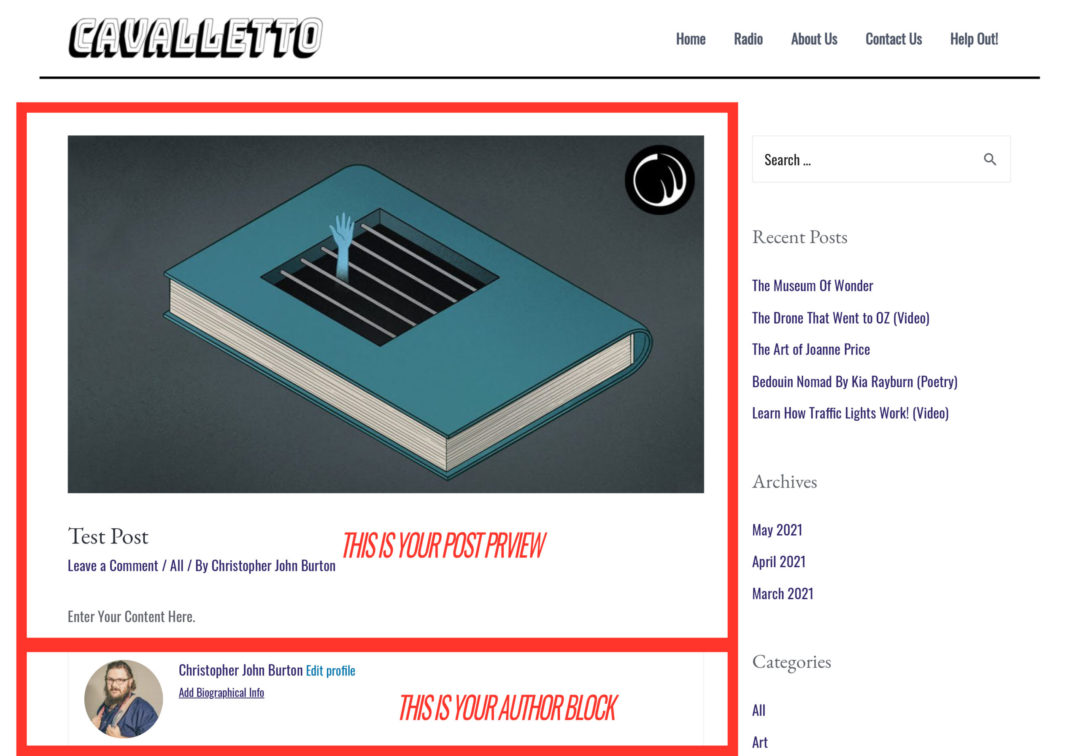
This is Your Preview and Your Finished Post
It’ll look basically the same as both preview and published post.
Notice the author block at the bottom. That’s how the reader is going to know who wrote the post and know who you are. I’ll go over editing that on down the page.
Once Your Finished With Your Post
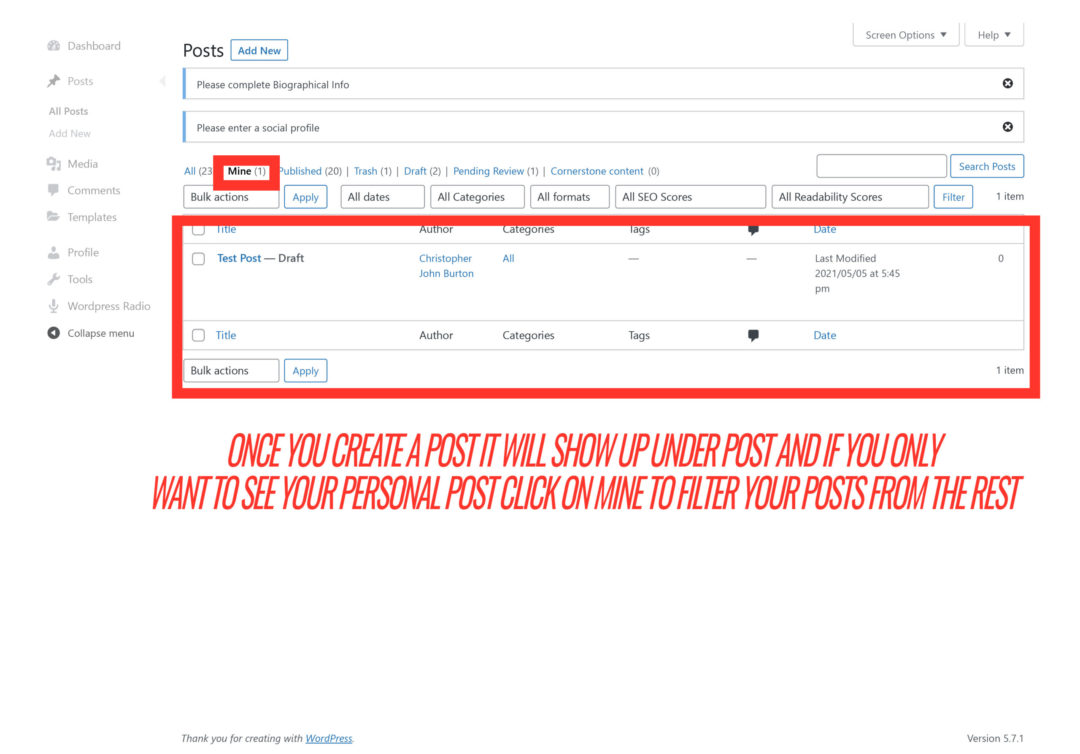
You can click on a large W on the top left hand side of the screen and this will take you back to posts. There you can filter out all the post on the site by clicking on “mine” and this will show you only the post you have produced so you don’t have to weed though everyone’s posts to find your own.
From here you can hover your mouse over your post and it’ll give you options like edit, make draft, quick edit. things like that. You can also delete posts from here as well.
Editing Your Personal Profile
Clicking on the “profile” tab on the left hand side of the screen will take you to your personal preferences that associated with you’re personal WordPress account. You can do things like change your name and the photo account with the account, among other things.
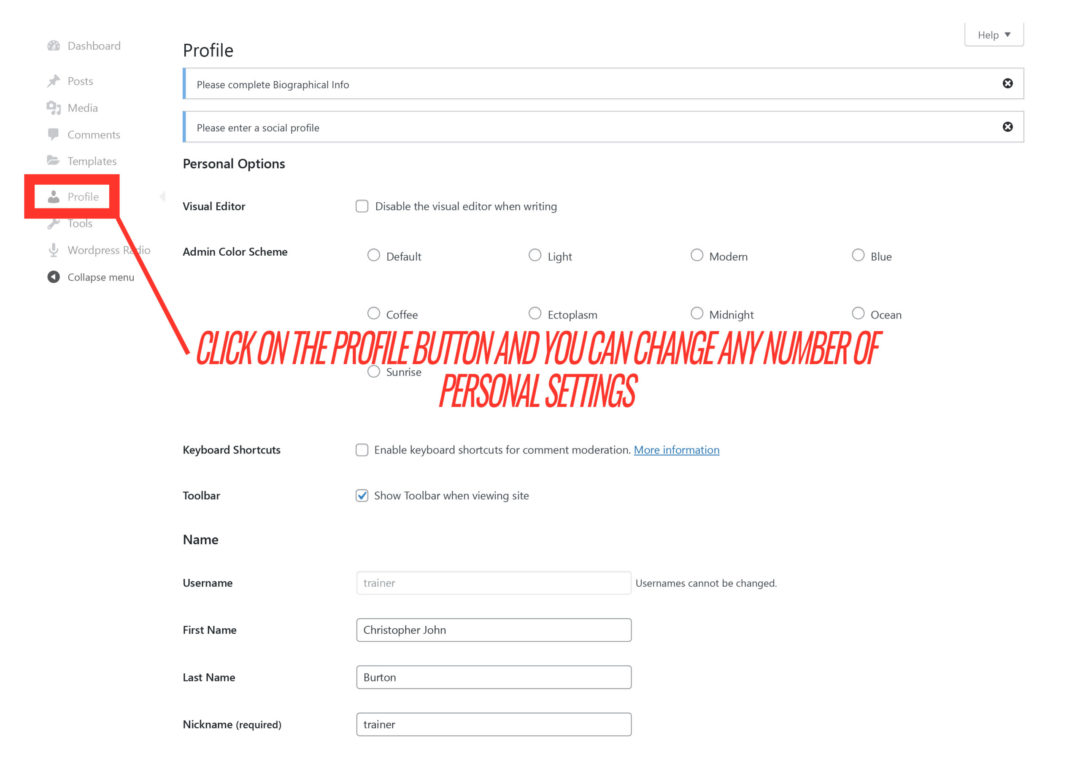
Editing Your Author Card
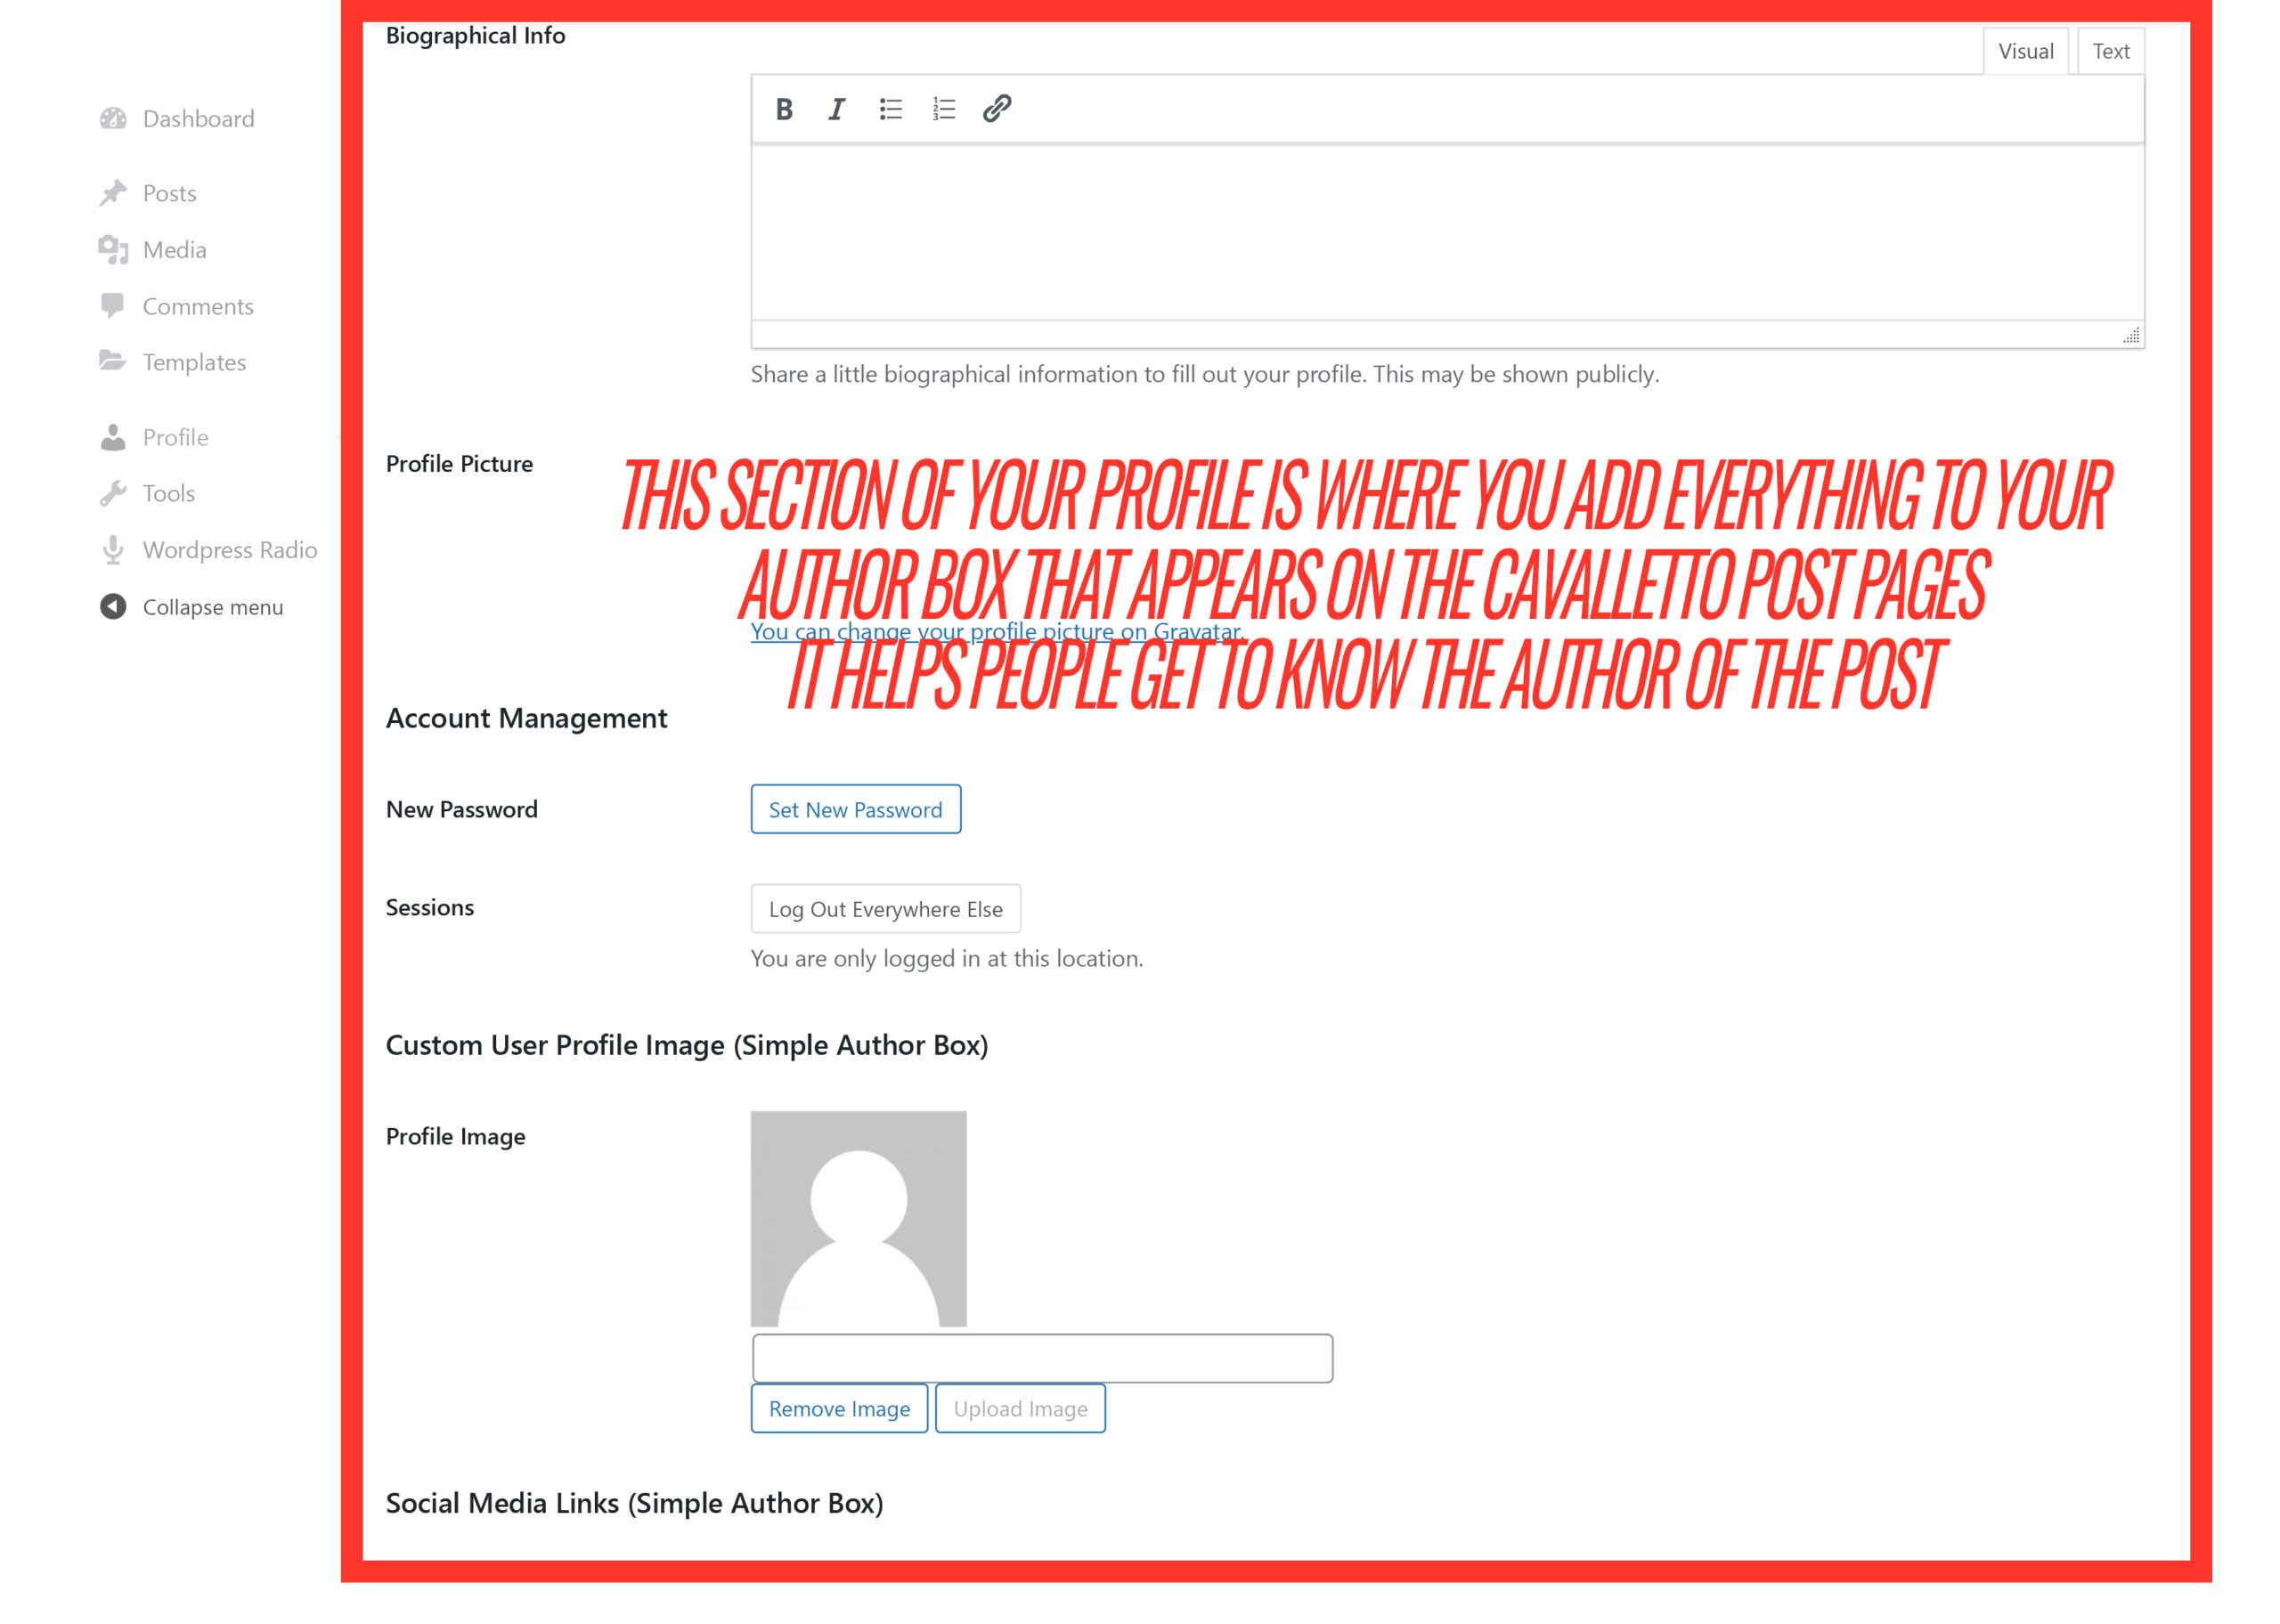
Also under the Profile Tab You’ll find A place for biographical Info, photos, and social media. This is where all the info for your author card is going to come from. This card will show up under all your post and also on the about us page under contributors.
Be sure and highlight all your accomplishments and your own personal website if you have one!
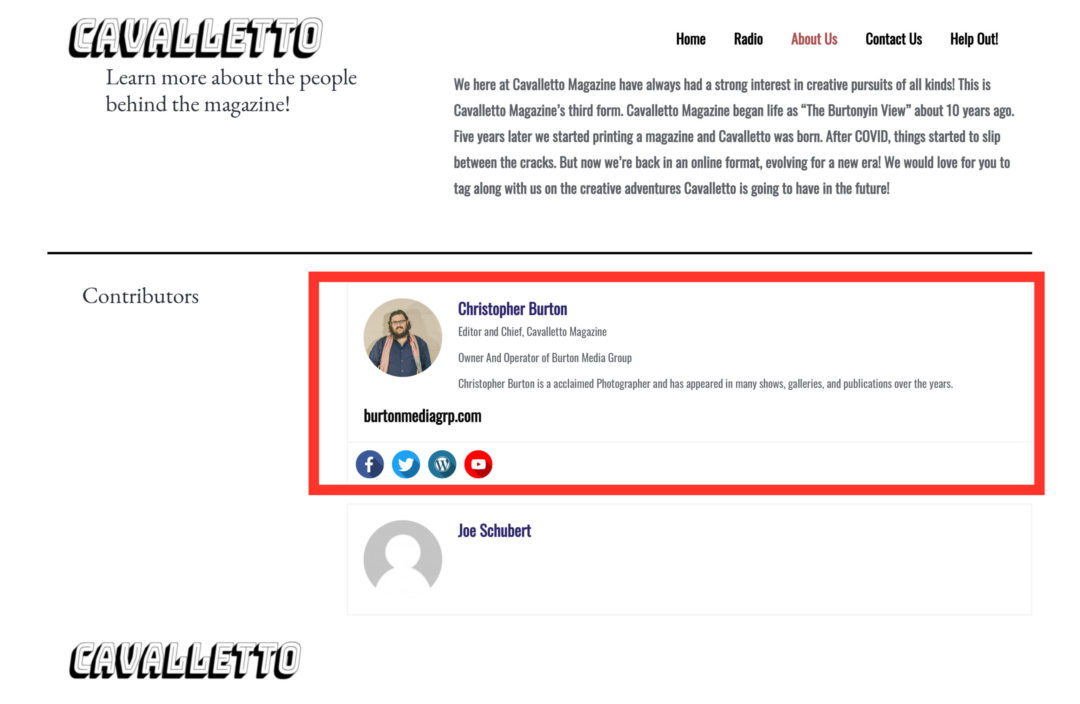
Your Author Card
This is what your Author Card is going to look like both under the “About us” page and under your post page.
Congratulations! You've Just Finished A Quick and Dirty Guide to Being A Contributor To Cavalletto Magazine!!!
If You Have Any Confusion What So Ever Contact Me At CAVALLETTOZINE@GMAIL.COM And We’ll Get The Problem Figured Out Together! Also Thank You So Much For Your Contribution To Cavalletto Magazine! We Couldn’t Do It Without People Like You!
